Which is Best and Why?
Ok, hopefully that question got your attention. However, when deciding between a lavalier (lav) (lapel) or headset (headworn) microphone the better question to ask is, “Which mic is best for the application?”
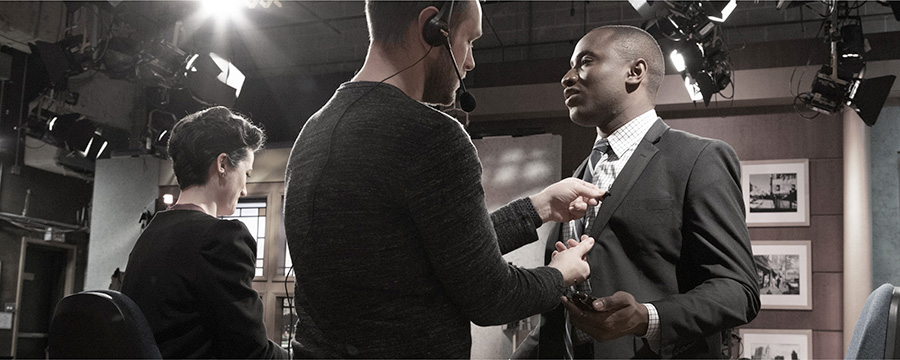
If you were to ask me or most pro audio sales engineers on whether to choose a lavalier or a headworn mic for general spoken word in live sound, we would recommend opting for a headworn model. Here’s why.
- Gain before feedback is much better – the mic is right next to the speaker’s mouth. Since the mic moves with the speaker’s head, the sound level and sound quality are consistent.
- They are available in unidirectional and omnidirectional polar patterns.
- They are barely noticeable, available in over one ear or wire frame models that allow the mics to be positioned about an inch away on either side of the wearer’s face.
- These days most pro-quality headset mics offer four color options so skin tone can be better matched.
Does that mean lavalier mics shouldn’t be used in the live sound application? Of course not. While conventional wisdom is reaching for a headset mic first, several situations are better suited for lavaliers.
- Lavaliers can be easily concealed in the hairline, in a prop, which is great for plays or theater applications. They can even be placed behind eyeglass frames.
- Omnidirectional lavaliers can cover more than one person, like a groom and bride saying their vows.
- Lavaliers are easily sharable between team members without adjusting headset or earset frames.
- Also, the wide selection of clips and hardware available make a lavalier a prime go-to for miking instruments like violins, horns, flutes, or guitars or instruments requiring a level of mobility that a handheld microphone cannot provide.
Lavalier (Lapel) Microphones
When it comes to reinforcing the spoken word in a live sound application, the lavalier may not be your best choice. They are very susceptible to feedback and require the experienced hand of an audio engineer to ring out the offending frequencies. For this reason, I would not recommend an inexperienced audio volunteer manage these mics at the mixing console. The following story is a poignant illustration.
An unsuspecting audio volunteer watched intently as the pastor clipped on his lavalier (lav) mic. The pastor preferred using the lav because he thought it looked less distracting. When given the cue, the audio volunteer dutifully brought up the fader marked “pastors lav.” As he did this the sound system started wailing into multiple frequencies of feedback. Some in the audience plugged their ears while others, a bit embarrassed by the situation, tried to pretend it wasn’t happening. Talk about a distraction!
If one is going to use a lavaliere in a live sound application, it’s best to use a cardioid or super-cardioid lavalier.
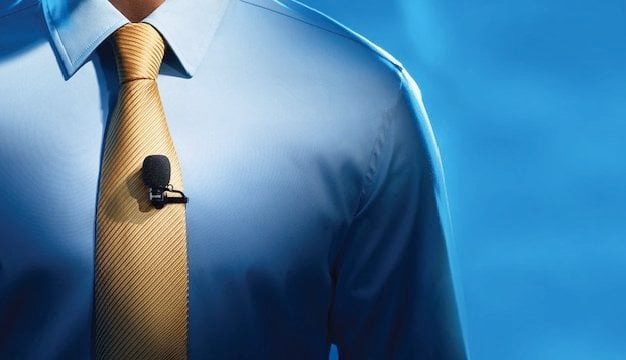
Lavalier/lapel mics are a great choice for recording and studio video productions, for example, pre-recorded video announcements or podcasts, etc. In the controlled studio environment, there are no feedback challenges to contend with. The lapel microphone’s inconspicuous placement, away from the face, makes it a preferred choice for video recording.
The key to getting the best sound possible into a lapel mic is to position the microphone high on the chest of the individual speaking. This may take some experimenting to get the position just right. No two people sound exactly the same, so you may find that different positions work better depending on the presenter.
Place the mic too low (below the sternum) and you risk picking up too much background noise. But if you place the mic too high (near the throat) you’ll get low, muffled tones and a lack of intelligibility. It is also important to avoid any areas where clothing or jewelry may come into contact with the mic, causing a rustling or muffled noise.
The sweet spot for most lapel mics is about halfway down the sternum or 5-8″ (12-20 cm) from the chin. See video about lavalier microphones.
Headset Microphones
This is the microphone of choice for spoken word in the live sound application. Headset microphones have gotten smaller and smaller over the years, to the point where it can be hard to tell if the person even has a mic on at all.
It is important that this microphone be placed near the corner of the mouth, but not in front of the mouth. This helps eliminate plosives and breath noise.
Some microphones may be designed to rest higher on the cheek, but the general rule of thumb is that the closer the microphone capsule is to the source, the better the sound reinforcement quality will be.
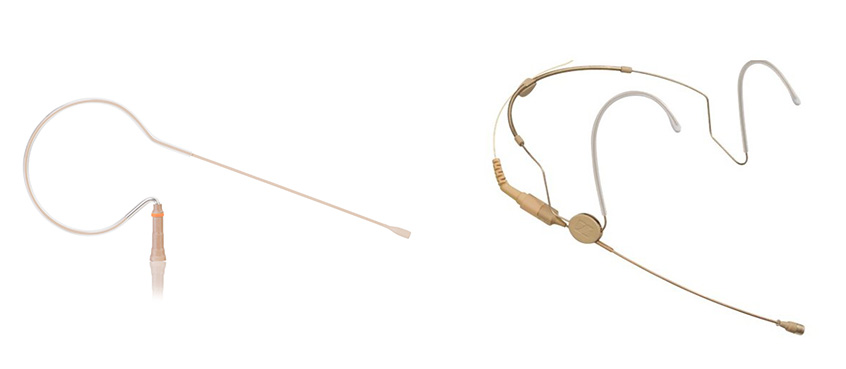
Headset mics come in 2 models: double over the ear and single over the ear. The double over the ear headsets are best for keeping that microphone capsule in the exact right placement at all times but they are a bit more cumbersome which is why many still prefer the single over the ear headset.
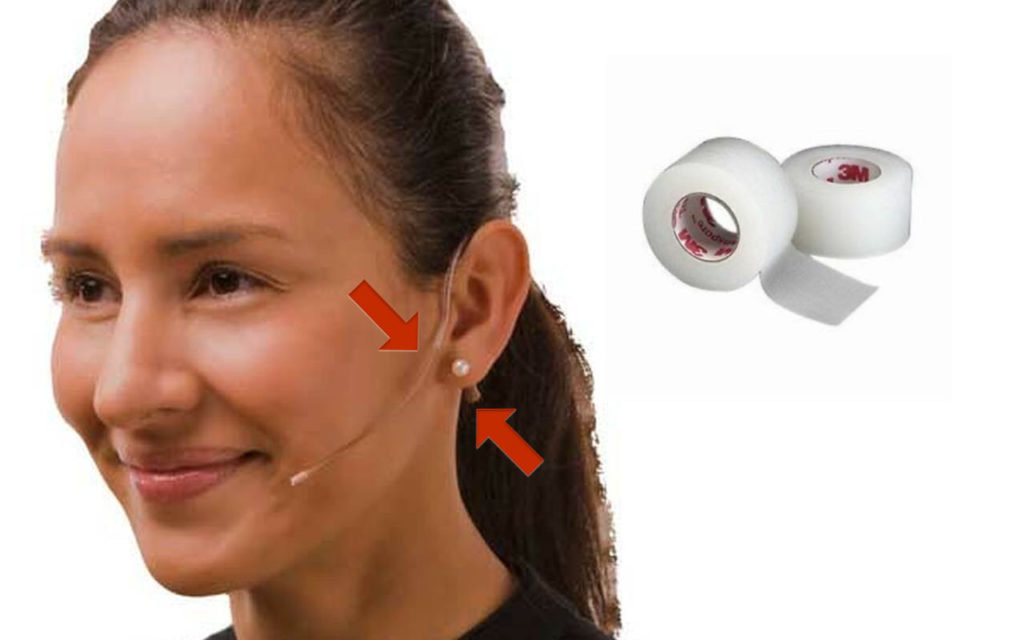
Keeping a single-over-the-ear-headset in good placement can be a challenge, especially when there are different users wearing them on a regular basis. The mic may start with good placement and then slowly fall until the capsule is hanging underneath the chin resulting in a lack of vocal clarity. The sound person may then try to turn up the mic which can then cause feedback.
Try this simple hack to keep a single-over-the-ear-headset in it’s proper placement. Place a small piece of transparent surgical medical tape at the beginning of the boom in front of the
ear and a piece behind the ear on the wire. Works like a charm!
Here are a few considerations to keep in mind when using headset microphones:
- Pay attention to individuals wearing dangling earrings, as their movement can cause distracting clicking noise against the boom of the headset when amplified. In many cases the dangling earring may need to be removed.
- Be mindful of individuals with beards, as the movement of their jaw can create a rustling noise when the beard rubs against the boom of the headset. This noise, when amplified, can resemble static. Adjust the boom position to ensure it does not come into contact with the beard.
These microphones are the best suited for minimizing feedback and providing the most natural speaking tones simply because they are positioned so close to the sound source – the mouth. While these microphones are also more expensive than lapel mics, they are worth their weight in gold if they allow you better quality sound and fewer feedback problems or other audio distractions. See video about headset microphones.
Conclusión
For use with spoken word in a live sound application, the lapel cannot compete with a headset in terms of sonic clarity and ease of use. For organizations utilizing inexperienced audio volunteers, a headset microphone is the recommended choice.
Lapel microphones excel when concealment is prioritized. When professionally set up by an experienced audio engineer for live sound reinforcement, they can still be a practical choice. Lapels are particularly well-suited for video production or studio settings.
Golden Preciado
Latest posts by Golden Preciado (see all)
- The Sound Behind the Scenes: The Psychology Behind Navigating Personalities - April 8, 2025
- Making the Transition from Floor Wedges to In-Ear Monitors - October 22, 2024
- Lavalier (Lapel) vs Headset Microphones - August 5, 2024